Mount Rainier Hiking by Starlight: A Stunning Camp Muir Experience

Not unlike many of my adventures, this one began with a nap. However, at 2:00 AM as a passenger on a slow, meandering drive through the forest, can you blame me? But as soon as our car slowed to a stop at the near-empty Paradise Visitor Center and my eyes took in our darkened surroundings, I knew that this was going to be a Mount Rainier hiking experience, unlike anything I'd ever encountered before.
And for context, keep in mind that I guided Mount Rainier hiking trips for a living. Both down in the surrounding valleys and up here near the summit. But this time, a shimmering ocean of stars sparkled above us, very different from my usual daylight hikes. Our group of four hikers was far enough from the ambient light of Seattle for us to easily pick out the Milky Way, the Pleiades, and any number of other subtle cosmic beauties that often remain hidden.
Mount Rainier itself wasn't precisely visible in this light, but we could detect its presence due to a distinct lack of light. Partway up that darkness was our destination – Camp Muir. With headlamps to light our way, we began hiking Mount Rainier with one of the mountain's most spectacular light shows about to unfold.
Camp Muir trail snapshot
Hike type: Day hike
Trailhead: Paradise Visitor Center
Destination: Camp Muir
Route: Skyline Trail - Pebble Creek Trail - Muir Snowfield
Length: ~9 Miles (roundtrip)
Camp Muir elevation gain: ~4,600 feet
Season: Best conditions from mid-June to mid-September
Terrain: Rocky and well-graded trails transitioning to a consistent snowfield
This hike from paradise to camp muir is divided into three distinct sections, and I'll cover our experiences along with crucial planning information for each portion below:
- Paradise to Panorama Point
- The Muir Snowfield
- Camp Muir
Getting there
This particular Mount Rainier trail begins and ends from the Paradise parking lot. Most visitors enter the park from the east gate – known as the Longmire gate or Nisqually entrance – and follow the main road directly to the Paradise Visitor Center.
This picturesque drive takes you along the Nisqually River, following the Longmire-to-Paradise road through one of the oldest national forests in the country. You'll pass the Longmire Visitor Center and National Park Inn about 6.5 miles past the park's main entrance gate. From there, the Paradise Inn and parking lot are about 11 miles further.
Permits
Remember that you'll need a National Park Pass to enter Mount Rainier National Park or purchase a day pass from the Nisqually gate. You must display your pass on your vehicle at Paradise and remember to check the road status beforehand to ensure that the road and gate are open.
Lastly, the Paradise parking lot fills up very quickly during the summer. Therefore, try to arrive as early as possible to get a spot – or aim for a night hike to watch the sunrise, and I guarantee that you won't have a problem finding parking.
Paradise to Panorama Point: Mount Rainier hiking in dazzling darkness
There's a serene beauty and calm to alpine night hiking, as I'm confident any mountaineer can attest. With the darkness removing the need to focus on visuals, the faintest sounds suddenly became amplified. But perhaps the most stunning aspect was the silence.
There wasn't the slightest whisper to betray another human presence on the trail for that first section. It was just us and the stars. Oh my, the stars.
The multitude of stars was a shimmering canvas of color and wonder that took our breath away faster than our steep climb. Simultaneously, the steady twinkle of planets and star clusters proved just as mesmerizing as the Mount Rainier hiking experience itself.
After around an hour and a half of headlight-assisted hiking for 2 miles, we emerged on top of Panorama Point and took in an ocean of beauty at 5:00 AM. The stars still sparkled with wonder, but Mount Adams and St. Helens stole the scene with their prominence. The sheer magnitude of rugged mountains was almost overwhelming – and our hike was just getting started.

Photo Credit: Dan Purdy
Planning information
There's an impressive network of trails around Paradise. However, the most direct route for this hike is the Skyline Trail, which you can jump on from the parking lot and follow directly to Panorama Point – a stunning vista overlooking the southern slopes of Mount Rainier. In the daylight, the hike features beautiful alpine meadows dotted by the occasional marmot.
For a less strenuous but equally beautiful day hike, consider following the Skyline loop in its entirety – instead of crossing onto the Muir Snowfield for the Camp Muir trip. This Mt Rainier hiking trail includes gorgeous alpine wildflowers, waterfalls, and mountain views.
The Muir Snowfield – Mount Rainier awakens
A gentle glow on the horizon hinted at the coming sunrise just as we transitioned from rock trail to the Muir Snowfield about 0.5 miles past Panorama Point. By now, the sun's approaching light and the bright white snow worked together to reveal our path – straight up. Our route was an unyielding succession of snowy stairs between those two frozen pillars taking us straight up to Camp Muir. Our Mount Rainier hiking trip had now permanently departed from rock, and we now felt on par with the countless snow-blanketed peaks that the rising sun was slowly revealing in spectacular fashion.
Yet, almost every one of those peaks was below us as our impressive elevation became apparent in the rising sun. A massive cloud – known as a Cap Cloud – formed just as the sun began to warm the surrounding atmosphere, magnifying the sun's light directly over the summit. The result was an awe-inspiring whirlpool of color, swirling just above our destination – Camp Muir.

Photo Credit: Dan Purdy
Planning information
Any hike to Camp Muir will encounter snow. Spring and early summer often see the snowline just above Paradise, when you'll be hiking on the snow for the majority of your adventure. Later in the season, in the late July to early September range, the snowline retreats to the permanent Muir Snowfield, which begins just beyond Panorama Point.
You can choose to take the direct route towards Camp Muir by following the junction for the Pebble Creek Trail. Alternatively, you may continue following the Skyline trail, which will connect to Panorama Point and loop around to rejoin the Pebble Creek Trail.
The Pebble Creek Trail will take you straight to the Muir Snowfield. Once there, you'll no longer be on a designated trail, and it's crucial that you be comfortable hiking and navigating on snow. The weather can change at a moment's notice and descend into whiteout conditions. You should have a map and navigation know-how to complete your hike safely. Camp Muir lies about 2 miles from the beginning of the Muir Snowfield, but don't underestimate how strenuous this part of the hike is. This section alone can take 1.5 to 4 hours.
Camp Muir, Mt Rainier – The world unfolds
The squat stone buildings showed themselves a solid hour before we arrived, a tantalizing oasis shining in the newly risen sun. But instead of constantly watching the finish line as our energy level's sagged, we took every opportunity to look up at the splendor of Mount Rainier.
Unencumbered by the earlier cap cloud, the mountain was a dazzling array of bright glaciers and imposing rock formations. The summit looked tantalizingly close from our vantage point, only 4,000 feet lower.
Finally, we reached the sheltered stone walls and buildings of Camp Muir at about 8:00 AM. The camp itself was already bustling as mountaineers had departed for the summit many hours ago. But from our vantage point at 10,188 feet, we felt on top of the world as we marveled at the endless array of mountains below us.
The snow's slippery and steep features now worked to our advantage on the descent. Rather than navigating this challenging terrain on foot, we made our way to smooth slides created by previous hikers and slid down the snow on our back-ends. Coming down to the Muir Snowfield only took about an hour, perhaps a third of the time going up.
We soon rejoined the rock trail, and we were back to the Paradise parking lot just as the midday crowds descended on the mountain. We'd seen Mount Rainier dance with the cosmos through the night in a stunning duet to which it seemed we were the only spectators. Humbled and awed, we descended the mountain for a well-earned nap – ending the trip just as I started it.

Photo Credit: Dan Purdy
Planning information
Camp Muir is the base camp for most summit attempts on Mount Rainier. While you'll see the stone buildings long before you arrive, take your time getting there. Remember to properly hydrate and rest during this late stage of your hike, and don't burn yourself out trying to reach Camp Muir quickly.
You'll descend back to the Paradise parking lot along the same route you took up. However, conditions permitting, you'll have the opportunity to slide – or glissade – down the Muir Snowfield. It is one of the most exciting aspects of Mount Rainier hiking, but make sure you consider the season and snowmelt, as rocks will start to appear late in the season. Additionally, it's worth reading some glissading tips before trying it on the mountain.
3 Tips on how to prepare for hiking Mount Rainier
Mount Rainier hiking takes much more preparation than your standard hiking adventure. Let's review a few considerations to make sure you have everything you need for a successful hike.

Photo Credit: Danielle Plouffe
1. Prepare for mountain weather
First and foremost, regardless of the weather forecast, you must prepare for mountain weather. Prominent mountains, and especially Mount Rainier, can generate inhospitable weather very quickly. Snap snowstorms, whiteout conditions, and rainstorms are common, and you should always start your hike with the gear and know-how to handle these conditions.
2. Budget extra time
Hiking up to Camp Muir is tough. You'll be climbing about 1,000 feet per mile during your ascent, which is very steep by any hiker's standards. Additionally, this hike begins at an elevation of 5,400 ft and ends at over 10,000 feet. Put both of these points together, and you should expect to move more slowly than your usual pace, even if you're an experienced hiker.
Budget plenty of time to complete this hike, at least 8 hours, and be prepared to turn around if the weather conditions begin to deteriorate.
3. Pack your 10 Essentials
In addition to your usual trail snacks, water, and layers, always remember to bring the 10 Essentials (or 10-Es) for Mount Rainier hiking. These supplies are your lifesaving tools in case you find yourself in a challenging situation on the trail. We always hope that we'll never need them. But trust me, you'll be thankful that you have them if the need arises!
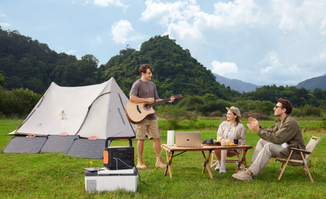
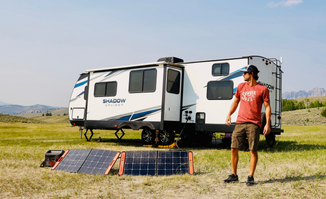
In addition to these essentials, you might want to consider a portable power station as an emergency power source. The Jackery Explorer 160 is lightweight, easy to carry and great for charging electronic devices during your outdoor adventure, such as phones and GoPros.
Additional Mount Rainier hiking trips
Camp Muir is just one of the almost countless hiking adventures in Mount Rainier National Park. There's never any shortage of day hiking or backpacking opportunities, from lush forest hikes to rugged alpine excursions.
On the other side of the mountain, the Sunrise Visitor Center is also a fantastic starting point for stunning Mount Rainier hiking trips. Take a look at the best Sunrise Mt Rainier hikes to find the route that suits you.
Now you have all the information you need to plan an incredible trip to Mount Rainier! While I certainly recommend a star-lit hike, this National Park is beautiful at any time of the day. Pick your hike, get your gear ready, and head out to explore!
Disclaimer:
The runtime mentioned for appliances powered by Jackery is for reference only. Actual runtime may vary under different conditions. Please refer to real-world performance for accurate results.





















































Leave a comment