


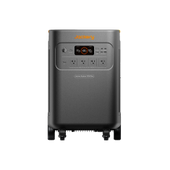


The Jackery Smart Transfer Switch (automatic transfer switch) seamlessly switches between the main electricity system and the power backup solution to ensure continuous power supply to the appliances. It is designed to integrate with solar panels and rooftop PV systems via the Jackery Explorer 5000 Plus Portable Power Station for uninterrupted power supply to the appliances. If you want to learn more about Manual Transfer Switch, click here.
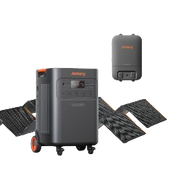
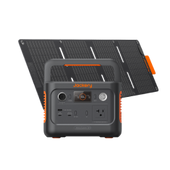
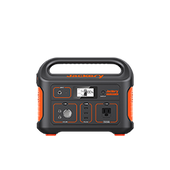
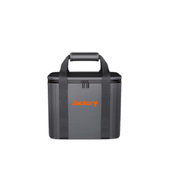
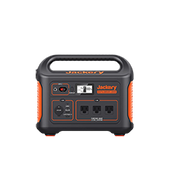
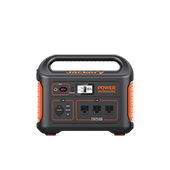
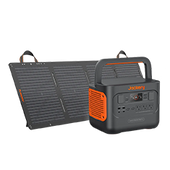
The Jackery Smart Home Kit comprises the Jackery Explorer 5000 Plus Portable Power Station and a Jackery Smart Transfer Switch. It supports 12 essential household circuits that accommodate a range of household appliances, such as TVs, refrigerators, network services, starklink, sump pumps, and lighting.
Whether you're dealing with an unexpected blackout caused by a storm or living completely off the grid, this reliable, high-capacity power solution like Jackery Smart Home Kit has you covered.
What is a Smart Transfer Switch?
A Smart Transfer Switch (STS) is a power switching device that can automatically switch between the main electricity supply and backup power supply to ensure continuous power during outages.
When the electricity grid fails to supply electricity, the Smart Transfer Switch automatically switches to a backup source like a battery backup or a solar generator to supply uninterrupted power to the electrical appliances.
The Jackery Smart Transfer Switch can be paired with the Jackery Solar Generator 5000 Plus to ensure seamless (less than 20ms) power switching between the main and backup power supply, so you are never left without power.
How Does It Work and Target Scenarios
The STS (Smart Transfer Switch) carefully monitors the voltage and frequency of the main electricity supply. If the main power fails, such as when a low voltage or an outage occurs, the transfer switch immediately switches to the backup power supply. Once the power supply is restored, the Smart Transfer Switch automatically switches back to the main electricity supply and shuts the backup power system.
The Smart Transfer Switch is essential for users looking for a reliable power solution for their disaster backup power needs. Let's check out different scenarios where a transfer switch sounds like a reliable choice:
Emergency Backup Power Users
If you live in an area that experiences frequent power outages or unstable electricity, pairing the Jackery Solar Generator 5000 Plus with the Jackery Smart Transfer Switch offers a reliable emergency backup power solution. It provides a 20ms UPS switchover and lets you power essential circuits during power outages.
Off-Grid Cabin Power Users
The Smart Transfer Switch can connect to off-grid cabin circuits and solar panels, allowing you to completely use green energy. With the Jackery Smart Transfer Switch, you get the added value of intelligent power management. For example, the companion Jackery mobile app helps you check power usage in real-time and even optimize energy consumption.
If you are using the solar generator in the backup mode and the power is sufficient, the STS can supply power to non-essential circuits in the off-grid cabin. However, once the backup generator's power drops below a certain value, the system automatically stops powering non-essential appliances and switches to essential circuits like the refrigerator and lighting.
Daily Use (Peak Shaving and Valley Filling)
If you're someone who wants to reduce their electricity bills, you might benefit from the peak shaving and valley filling features of the Smart Transfer Switch. You can develop charging and discharging plans based on the electricity prices to save on bills. For example, if the electricity price drops in the morning, you can schedule the charging of the power station during those off-peak hours.
The Jackery Smart Transfer Switch also offers longer backup time by helping critical devices receive priority support so there is no unnecessary power consumption. When the power station has sufficient charging, it starts charging the non-essential circuits. However, when the power drops below a set value, it only charges essential appliances like refrigerators and lighting.
How to Install Smart Transfer Switch
Here's the step-by-step process in PDF file for you to down: install the Jackery Smart Transfer Switch.
Note:
1. If you have installed the Jackery Manual Transfer Switch, please uninstall it before installing the Jackery Smart Transfer Switch.
2. You should be a certified electrician to process the installation.
Step 1: Install the Wall Mount
The first step is to use a hand drill to install the upper and lower wall brackets on the back of the STS. Secure the template on the mounting wall and then carefully mark each hole location using a pencil.

Step 2: Drill Holes and Secure the STS to the Wall
Next, drill holes in the wall and then secure the Smart Transfer Switch. To do this, install the upper and lower wall brackets on the back of the STS using four M4 screws.

Note: During the drilling process, make sure to cover the interior equipment to prevent debris and dust from interfering with the equipment.
Step 3: Connect the Power Station
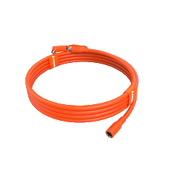
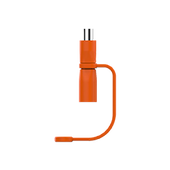
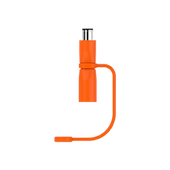
Start connecting the Jackery Explorer 5000 Plus Portable Power Stations with the STS (Smart Transfer Switch). Once the connection is established, make sure to lock the power input/output cable's plug.

Step 4: Connect the Mains and Load Circuits
Cover the front panel before using the Smart Transfer Switch and connect the mains power at 240V. Connect the grid's hot, neutral, and ground wires from the electrical panel to the STS. Now, connect the hot, ground, and neutral wires to the STS of the load circuit.

Step 5: Download the Jackery Mobile App
Download the Jackery mobile app on your Android or iOS device and then bind it to the newly installed backup power system. Press the IoT button to enable Bluetooth or WiFi and then add the device.
Step 6: Configure Split Phase in the App
Finally, two single-pole circuits are combined to create a two-pole 240V circuit. You can update the circuit names based on the connections made during installation. That's it! The installation of the Jackery Smart Transfer Switch is complete!
How to Remove Smart Transfer Switch
If you want to remove the Jackery Smart Transfer Switch, you need to follow some steps like turning off the breakers, disconnecting the power station, unlocking the panel, etc. Let's check the step-by-step removal process (click to download the PDF file) below:
Step 1: Turn Off Breakers and Power Station
Start by turning off the Jackery Explorer 5000 Plus Portable Power Station. Then, turn off the circuit breakers on the Smart Transfer Switch and the home distribution panel.

Step 2: Disconnect with Power Station & Unlock the Panel
Unlock the power input/output cable's plug from the Smart Transfer Switch to the Jackery Explorer 5000 Plus Portable Power Station. Lastly, unlock the STS cover.
Step 3: Disconnect the Grid Conductors
Start disconnecting the hot, ground, and neutral wires from the electrical panel to the Jackery Smart Transfer Switch.

Step 4: Disconnect the Home Load Conductors
Similarly, disconnect the load circuit's hot, ground, and neutral wire from the smart transfer switch.

Step 5: Remove Brackets
The final step is to remove the upper and lower wall brackets on the back of the Smart Transfer Switch.
Smart Transfer Switch Installation Service
You may use your own certified electrician or handle the STS installation yourself (if you are certified) at your own expense. The STS User Guide and installation videos are available on our website for your reference. Jackery has partnered with third-party installation companies to provide installation services for US customers. We highly recommend contacting Jackery for installation, training, and certification before proceeding with your installation.Once you receive your Jackery 5000 Plus and the STS, please complete the online questionnaire and contact Jackery to initiate the installation process. A representative from our partnered installation company will reach out to discuss logistics and service coverage in your area. An assigned electrician will collaborate with you on scheduling, on-site surveys, installation details, and costs. If you have any questions or concerns about your installation, you can always contact Jackery via email at hello@jackery.com or by phone at 888.502.2236. Installation service is limited to designated areas. See T&C for details.
Important Notes:
1. After the electrician conducts the on-site assessment and informs you that your site does not comply with the requirements of the Jackery Smart Transfer Switch (STS), the cost of the electrician’s evaluation and time will be the customer's responsibility.
2. If you choose our installation service and the electrician completes the installation, but you later decide to return the STS for personal reasons, the installation fees are nonrefundable. Additionally, any costs associated with uninstalling the STS will be the customer's responsibility.
3. For any questions or assistance, please contact our customer service team.
FAQ
Q: Will Smart Transfer Switch work with Jackery Explorer 2000 Plus or 3000 Pro?
A: No. Smart Transfer Switch works with Jackery Explorer 5000 Plus. The Jackery Manual Transfer Switch works with Jackery Explorer 2000 Plus and 3000 Pro.
Q: Will Manual Transfer Switch Work with Jackery Explorer 5000 Plus?
A: Yes. Manual Transfer Switch works with Jackery Explorer 5000 Plus with a NEMA L14-30P to NEMA TT-30R adapter. (Not provided by Jackery)

Q: Who is eligible to install the Jackery Smart Transfer Switch (STS)?
A: Any certified electrician should be able to install the STS.
Q: Can I use my own electrician or by myself?
A: Yes, you may use your own certified electrician or handle the STS installation yourself (if you are certified) at your own expense. We highly recommend contacting Jackery for training and certification before proceeding with the installation. You can also refer to the STS User Guide, FAQs, and installation videos available on our website.
Q: Does Jackery provide installation services for the STS?
A: Jackery does not install the STS but we’ve partnered with third-party companies to provide installation services for U.S. customers in over 40 states.
Q: Who should I contact for my installation - Jackery or a third-party company?
A: If you choose to use Jackery’s resource for your installation, please contact our Customer Service at hello@jackery.com or 888.502.2236.
Q: What information do I need for my installation?
A: Jackery or third-party company will send you a questionnaire to begin the installation process.You should prepare your order information, contact information including your email, phone number and address for the installation.
Q: I’ve completed the questionnaire and contacted the installation company but haven’t received a response. What should I do?
A: Ensure that the email and phone number you provided are correct. Also, check your Spam folder. If you still don’t receive a response, contact the installation company or Jackery again. A representative will reach out to the customer.
Q: The installation company scheduled an electrician for me, but I haven’t heard from them. What should I do?
A: Check your Spam folder first. If there’s still no response, contact the installation company or Jackery again for assistance.
Q: What if the electrician is unable to provide service on time or cannot be contacted?
A: The customer should contact Jackery or the installation company, who will assist in reaching the electrician or assign a new one.
Q: What checks/inspections are performed before installation?
A: The assigned electrician will perform a pre-installation inspection and conduct an on-site assessment to evaluate the installation site and determine the necessary materials. If an on-site visit is not feasible, a virtual inspection can be arranged instead.
Q: How will I be notified of the installation quote?
A: After completing the inspection, the electrician will prepare an installation quote and send it to the customer for confirmation. Installation will proceed only after the customer agrees to the quote.
Q: What should I do if I have concerns or I'm dissatisfied with the quote?
A: The customer can discuss the details of the quote with the electrician or the installation company to seek reasonable adjustments.
Q: How is a faulty or defective STS handled before, during or after the installation?
A: The customer should contact Jackery customer service to arrange a return or replacement. Jackery will handle the return of the defective product and arrange for a replacement to be shipped to the customer’s home.
Q: What should be done if issues arise during the installation?
A: If any issues occur during the installation process, the electrician should promptly contact Jackery’s technical support team for assistance.
Q: What should the electrician do if the on-site conditions differ from expectations?
A: The electrician should immediately contact both the customer and the installation company to discuss solutions and adjust the installation plan accordingly.
Conclusion
The Jackery Smart Transfer Switch (STS) is designed to seamlessly switch power between the main power supply and the backup power supply within seconds, ensuring that essential devices like computers, routers, and refrigerators continue running without interruption. The UPS feature requires connecting the STS to the Jackery Explorer 5000 Plus, which must be activated through the Jackery app. Understanding how to use the STS helps reduce energy costs by optimizing power usage and switching to stored power during peak hours.
Reply to Comments
While our current blog comment system doesn't allow for direct replies, our customer service team will address comments and questions promptly via email. Additionally, we'll compile the most frequently asked questions and provide comprehensive answers at the end of the blog post.
Comment: Hi, can you configure your Jackery Explorer 5000 to run the circuits in the STS to use solar power first and then Jackery battery power and finally switch back to grid if neccessary?
-Reply: Jackery 5000 Plus can run the circuit in the STS but can't switch the power back to the grid.


I’m interested in getting a Explorer 5000 Plus + Smart Transfer Switch.I currently have a Solar system installed that backfeeds to the grid.the solar systems stops working during an outage. Ideally it would be nice for the solar system to continue to to charge the Jackery system during an outage, How will the Smart Switch work with this, or is it possible?
To Jim Hinton:
I don’t have a grid-tied solar system so I can’t give you a definitive answer, just a suggestion. The 5000+ can input up to 4000 watts of solar. You could, theoretically, disconnect some of your existing panels from the grid-tied inverter and instead route them directly to the 5000+. That would split your existing solar into two different arrays, a “grid tied” and an “off grid” solar array. They could work simultaneously, the off-grid array would power the 5000+ and the grid-tied array would power your main panel. If the load on the circuits in the STS are 4000 watts or above, you’d get 100% of the production of your 10K system just like you do now. If the load your main panel is less than 6K (excluding the STS’s loads) then your grid-tied system will still be able to sell the excess solar production back to the grid, but only up to 6K worth. I don’t know how much your system generates and exports, but if it’s never more than 6K, then it seems to me that this dual system gives you the best of all worlds: 10K of usable solar, export to the grid, and 4K of usable solar when the grid’s down.
To Terry: No. The STS only works with the 5000+.
(not a Jackery official, just an STS owner)
To George Swanner: Sort of. But not exactly. Solar only goes to charging the battery, that’s all it can do. So if the battery discharges to meet the load, then the solar can charge it right back up. The net effect is that basically it is using solar to meet the load, but it has to be run through the battery first.
Second, using battery first and grid as a last resort: yes you can do this. You can tell the 5000+ not to recharge itself from the grid, so it’ll recharge itself from solar as long as the sun’s out, and then it will run the circuits in your STS for as long as the battery lasts. You can even assign priority to the circuits so that some of them are “essential” and some are “would be nice to have”. If the battery’s fairly charged up, it’ll run all those circuits, but if the battery depletes to a pre-set level then the STS will disable the “nice to have” circuits so that the remaining power can be focused on the “essential” circuits.
If the battery of the 5000+ is completely depleted and there’s no solar coming in, and you’ve told it not to recharge itself from the grid, then the STS will switch back to full grid mode.
You can also tell the 5000+ not to recharge itself during certain hours, so if you have on-peak and off-peak pricing from your power co, you can tell it to wait for off-peak times before recharging itself.
Hello, can the smart transfer switch panel feed into an existing Manual switch panel (that is already installed with the house electrical panel)?
Leave a comment